

How To Make Ghost Shrimp Pump
Making a Elementary Ghost Shrimp Allurement Pump
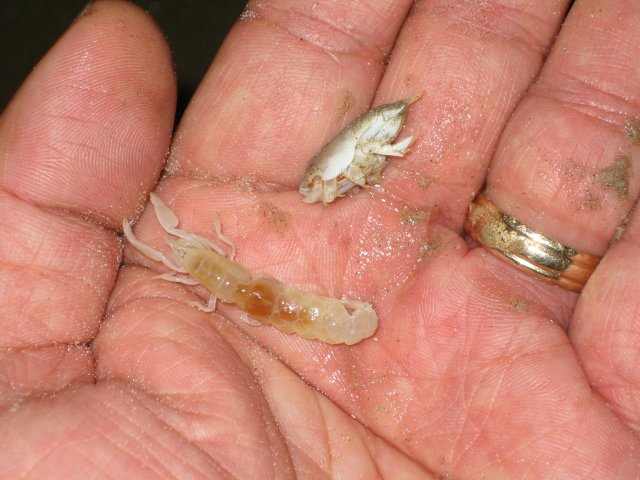
Ghost Shrimp and a Sand Flea!
Ghost Shrimp Pump
In preparation for an upcoming fishing trip to the Texas Gulf Coast, I decided to make a Ghost Shrimp Bait Pump.
Ghost Shrimp are abundant along the beach and brand excellent bait when surf line-fishing. Moreover, a Allurement Pump makes for an easier way to catch Ghost Shrimp compared to digging for them by mitt or with a paw shovel.
To make one, start with gathering the textile listed below. All of which are readily available at home comeback/hardware stores.
- Ane 30" length of ii" diameter PVC Pipage
- One 33" length of three/iv" bore PVC Pipe
- I 2" diameter Cap
- One 3/4" diameter Cap
- One 3/4" diameter "T" Connector
- One 2" diameter Test Plug
- One ane-5/8" Washer with a three/8" Pigsty
- PVC Cement
- five" Epoxy
Next, you will need tools for cut the PVC pipe and drilling holes in the ii Caps. Suggested tools are:
- Hacksaw for cutting the PVC pipe.
- Power Drill for drilling the holes in the Caps.
- Dremel Tool or a File for shaping/smoothing the holes.
- 1" Hole Saw Bit.
- 3/8" Drill Bit.
Assembly
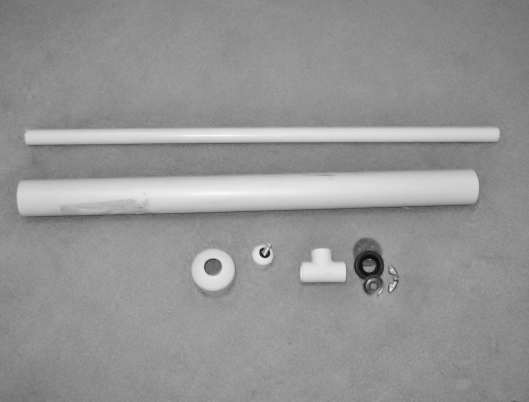
Minimal Material Needed!
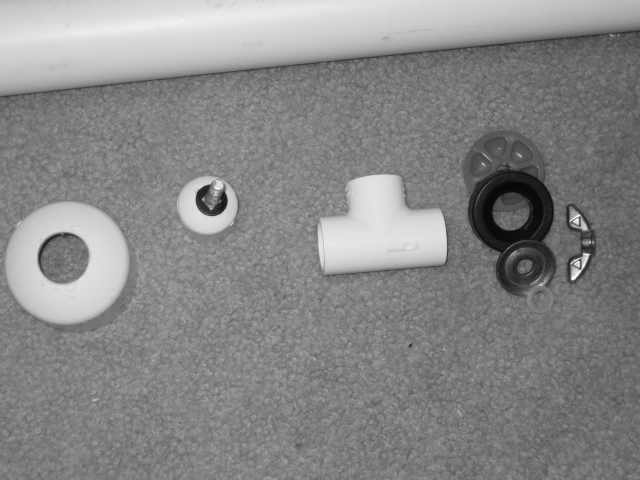
Caps drilled, "T" Connector, and Test Plug disassembled
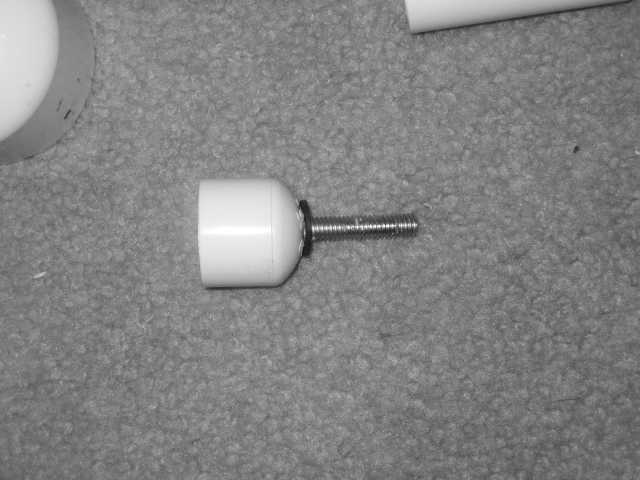
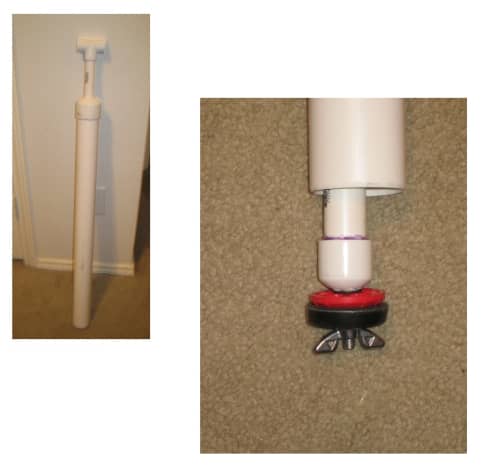
Screw from the Test Plug inserted in the three/4" Cap and epoxied in place.

Test Plug reassembled with the i-five/8" Washer added.

Material dry fitted and tested.
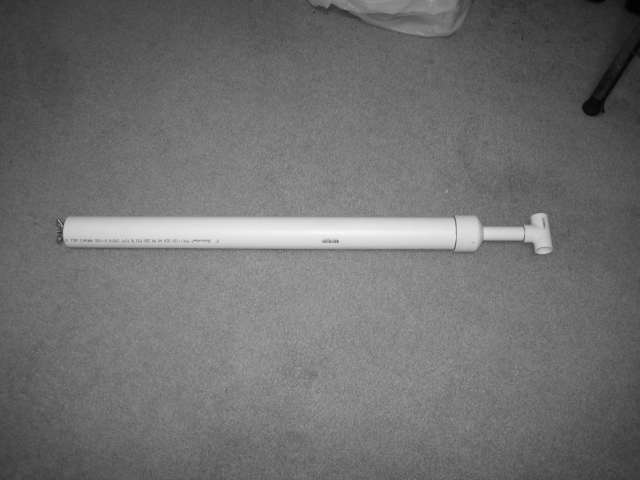
Cloth assembled and cemented in place.
Instructions
In one case yous have gathered the material and tools are in hand, you are ready to make a simple Ghost Shrimp Allurement Pump.
To make one, follow the steps beneath:
- First cutting the PVC pipes to length. Call back the 2" bore PVC pipe will exist 30" in length and the 3/4" bore PVC piping will be 33" in length.
- Side by side, drill the holes in the ii" bore Cap and the three/4" diameter Cap. The 2" Cap will need a 1" hole drilled in the center. The 3/4" Cap will need a iii/8" hole drilled in the center.
- And then, disassemble the Test Plug and go along the following components: 1 Screw, one Wing Nut, two Plastic Washers, "bottom" of the plug, and prophylactic gasket.
- When you disassemble the Test Plug, note the ii parts that make up the "lesser" of the plug and the "elevation" of the plug. Keep the bottom office; it is the one that is inserted into the piping. The tiptop part is not used; it is replaced by the i-5/8" Washer.
- Next, reassemble the Test Plug components, 3/4" Cap, and ane-five/viii" Washer: (ane) Insert the Screw into the 3/four" Cap then epoxy it in place. (2) Allow the epoxy to gear up per the manufacturer's direction. (three) Once set, place the remaining parts onto the screw in the following order - plastic washer, "bottom" of the plug, rubber gasket, 1-v/viii" washer, plastic washer, and and then the wing nut. (4). Permit the epoxy cure per the manufacturer's management. (Refer to pictures in the sidebar for more detail).
- While the plug cures, smoothen/shape the hole that was drilled into the 2" bore Cap so as to allow the 3/4" diameter PVC pipe to motion up and down freely. The 3/4" PVC pipe has an outside diameter that is just most an ane" wide. A little shaping is required in this step. We recommend a Dremel Tool equally it will brand quick piece of work of fitting the pipe to the cap; still, a file volition practise the job as well.
- Once the epoxy is set, you lot can dry out fit the parts and examination the pump's performance. When dry out plumbing fixtures the parts, remember the order that you fitted the parts. You volition follow that aforementioned order when cementing them permanently.
- Dry out Fitting Parts - (i) Showtime with dry plumbing equipment the "T" Connector and 3/4" diameter PVC piping. (ii) Then, dry fit the 2" Cap and the 2" diameter PVC pipage. (3) Insert the other end of the 3/iv" diameter PVC pipe into the 2" Cap/2" PVC pipage. (4) Finally dry out fit the three/four" Cap/Test Plug to the other end of the three/4" PVC pipe.
- Next, test the dry fitted Bait Pump checking that the 3/4" diameter PVC pipe moves smoothly upwards and down. Don't worry that the Test Plug is not creating suction; this will exist tweaked after parts are cemented. Likewise, be careful every bit the parts are dry fitted and may disengage themselves when testing.
- Once you have finished testing the dry-fitted pump and made adjustments where needed, y'all can proceed with cementing the parts permanently. Remember the order you lot used to assemble the pump when dry fitting, so disassemble the dry-fitted pump.
- One time disassembled, cheque the 3/4" Cap/Examination Plug to see that the epoxy has cured. If the manufacturer's directions crave 24 hours to cure, wait to proceed with cementing until then.
- When the 3/iv" Cap/Examination Plug is cured, continue with cementing the allurement pump per the directions of the manufacturer. Call up the social club you lot used for dry out fitting and wait till the cement has dried before using the bait pump.
- In one case the cement has stale, you demand only to tighten the Wing Nut until the desired suction is attained. Too tight and the pump will bind; as well loose and the pump will take trouble creating the suction needed to remove wet sand/mud.
- Options: Some opt to add a handle to provide improve leverage when burrowing into wet sand/mud. Too, chamfering the within of the 2" bore PVC pipe's end with a Dremel Tool makes for easier burrowing too!
Photo Gallery
Results
Made it to the Embankment and was able to test the Ghost Shrimp Bait Pump... SUCCESS!
Caught a Ghost Shrimp and a Sand Flea!
Hope to post a few pictures of fish defenseless using Ghost Shrimp and Sand Fleas for bait in the almost future!
© 2011 hbng84
hbng84 (writer) on March 06, 2017:
Cool Licia! Like the modernistic, too!
Licia on March 06, 2017:
Merely made 4 of these. Then easy! Thanks! For my second set we substituted a ii" to 1"in reducer bushing and a 2" coupler for the ii" cap. That permit the states avoid drilling the pigsty in the ii" cap which was the hardest step. Instead the pigsty was built in!
hbng84 (writer) on February 05, 2013:
Had a lot of fun making the video clip of united states of america using the pump that Summer! Even amend, really liked the Beer Batter Fish Fry recipe nosotros used melt some Striped Bass!
Source: https://skyaboveus.com/fishing/Making-a-Simple-Ghost-Shrimp-Bait-Pump
0 Response to "How To Make Ghost Shrimp Pump"
Post a Comment